version-control
Materials originally developed for the "Version control for research" breakout session of the Best Practice for Code Archiving workshop, 11 December 2016.
Connecting to a remote repository
So far, everything that we’ve done has only affected our local git repository. Likely you’ll want to connect your local repository to a remote repository using a hosting service such as GitHub. Syncing your local repository to a remote will back up your code and provide a central store for your project, allowing you to share your work or to access it from another computer.
Creating a new repository on GitHub
First, you need to create a GitHub repository to use as a remote. You should have created a GitHub account already. Log into GitHub and go to your profile page. On the Repositories tab, click New.

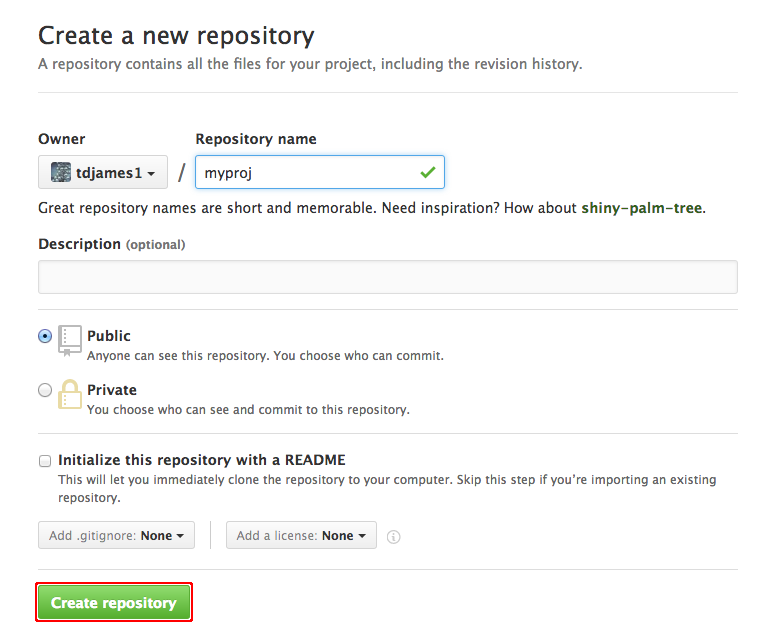
At the Create a new repository screen, give your repository a name and click Create Repository.

The next screen provides sets of git commands for use in different circumstances. Find the section labelled …or push an existing repository from the command line and copy the commands to the clipboard.
These commands tell git to set the remote repository for your project and need to be executed from within your project directory. The first line has the form:
git remote add origin https://github.com/ghuser/myproj.git
This indicates that you want to use the GitHub repository myproj
belonging to the user ghuser as the remote for your local
repository, using the HTTPS protocol1.
The second line is required because, having set the remote, you need
to perform an initial git push to push your local changes and set up
your project to sync with the remote:
git push -u origin master
Once you’ve run these commands, visit the GitHub page for your remote repository to confirm that the project has been uploaded.
Next: Subsequent workflow
1There are two alternative methods
for connecting to a remote, HTTPS and ssh. See the
GitHub help pages
for more information.
