version-control
Materials originally developed for the "Version control for research" breakout session of the Best Practice for Code Archiving workshop, 11 December 2016.
Working in the version control framework
In the previous step you initialised a git repository, added some files that you want git to track and created the first commit in your version control history.
Before you go further, check that version control is set up by running
git log. This should report the details of your initial commit.
Now that your project is under version control you can keep track of any changes that you make.
Making changes
Open the README.md file and add a few lines describing your project. Also, change the heading from “My project” to something more specific. Save and close the file.
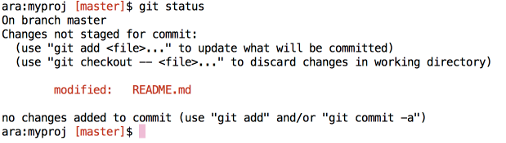
Now, use git status to check the state of the working directory. It
should report that you’ve modified README.md:
For further details of the changes that have been made, you can use
git diff:
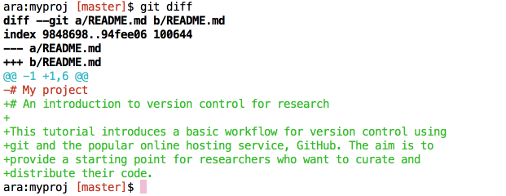
This produces a detailed report of the changes. Lines prefaced with a
- indicate lines that have been removed, while lines with a + at
the start are additions. Notice that changes to a line are, from git’s
point of view, a line deletion combined with a line addition.
If you’re happy with the changes that you’ve made, use git add to
stage your file.
Committing your changes
For this tutorial it’s fine to carry on using git commit -m with a
short message when you commit your changes. However, it’s a good idea
to get into the habit of writing commit messages which explain the
modifications that you’ve made in more detail. That way you’ll have a
detailed record of the changes that you have made to your code to
which you can refer later. This can be really useful when you want to
review the history of your project.
Optional
Using git commit without the -m option prompts git to open a text
editor in which to compose your message. Note that the text editor
that is used depends on your git configuration. Before going further
you may want to make sure you’ve
set the core.editor option to something sensible,
as the default option used by git is not very user-friendly.
A good strategy for commit messages is to start with a short, one-line summary of the commit, followed by a longer description of your changes. For example:
Update README file

Update README file to include the proper title and a description
of the project aims.
Use git commit to insert a commit message in this format.
Reviewing version history
You can view the history of your project using git log. This lists
each commit together with its unique SHA1 identifier, date, author,
and commit message. The commit history can be extremely useful for
finding bugs or looking back to changes that you made to your project
a few months ago.
You can use the information in the commit history to extract detailed
information about changes made in a particular commit. For example, to
see a detailed report of the changes for a commit you can use git
show -p together with the first part of the SHA1 identification
string for that commit:
git show -p f9fae515
This will display the changes introduced in the specified commit in a
similar format to the output from git diff.